Did you know Windows 10 has a screen recording utility called the Xbox Game Bar? With it, you can record a video of your actions in just about any Windows app on your laptop, whether you want to capture gameplay or create a tutorial for someone on using Microsoft Office. to create easier for you, we’ve outlined some simple steps on how to record video of an app in Windows 10.
The video recording tool is part of the Xbox app that comes installed by default in Windows 10. Xbox Game Bar recently received some major updates to create it more useful, so you can now take screenshots and even make memes.
How to Record Video of an App in Windows 10
1. Open the app you want to record. Unfortunately, the tool can’t capture some programs, such as File Manager, or the entire desktop, but it does work in regular apps, whether from the Windows Store or desktop apps.
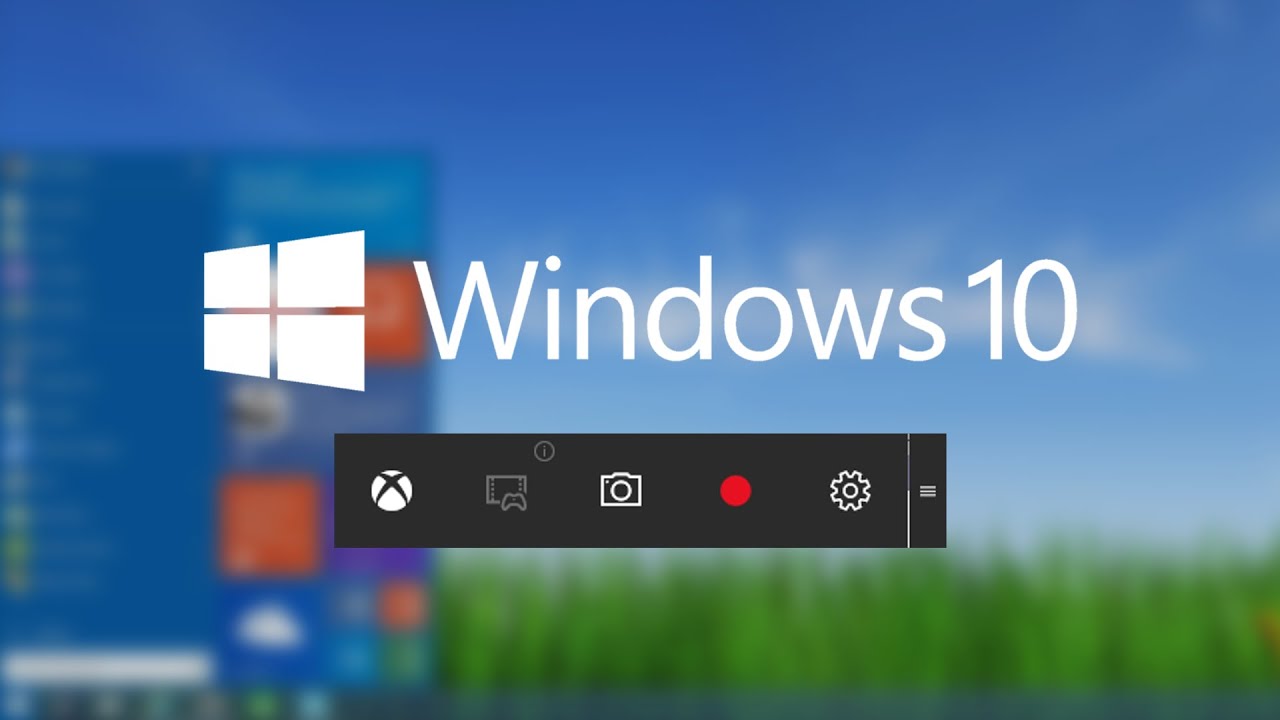
2. Press the Windows key and the letter G at the same time to open the game Bar dialog.

3. Check the “Yes, this is a game” checkbox to load the game Bar. this is the procedure whether you are recording a game or another kind of app.
4. Click on the start Recording button (or Win + Alt + R) to begin capturing video.

5. Stop the recording by clicking on the red recording bar that will be on the top right of the program window. (If it disappears on you, press Win + G again to bring the game Bar back.)

That’s it! you will find your recorded videos, which are MP4 files, under the Videos folder in a subfolder called Captures. You’ll also find them in the Xbox app under the game DVR menu, where you can trim a video and share it on Xbox live (if it is a game).

Note that you can also use the Xbox recording tool to take screenshots. instead of clicking the recording button, click the camera icon on the game Bar or Win+Alt+PrtScn.
We hope that this helped, and you could even teach someone else how to record video of an app in Windows 10.